
The Ultimate Guide To Batik Wax Removal From Fabric
I tell my batik students all the time: there’s a reason I named my company WAXON, not wax off. Removing the wax from a batik can be the most frustrating part of it all… there’s so many things that can go wrong!
You can work really hard to do all the right things and still have excess wax clinging to (or worse, still in) your fabric. It can be a huge mess, or even dangerous, if you don’t know what you’re doing.
I’m going to talk you through my whole process, which I’ve tailored and tweaked over the years to suit my projects, my studio, my preferences and my needs. There’s a lot of information in this post!
Two disclaimers: certainly, there are many variations in the batik wax removal process, and every artist goes about it differently. This is my experience and what I teach.
Also, this is not a post about how to batik, or batik designs for beginners, batik techniques, etc. In other words, instead of a batik dye tutorial, this is a batik wax removal tutorial!
Those front-end posts will come soon enough, but for now, we’ll focus on the back end of the process — batik wax removal. It’s essential.
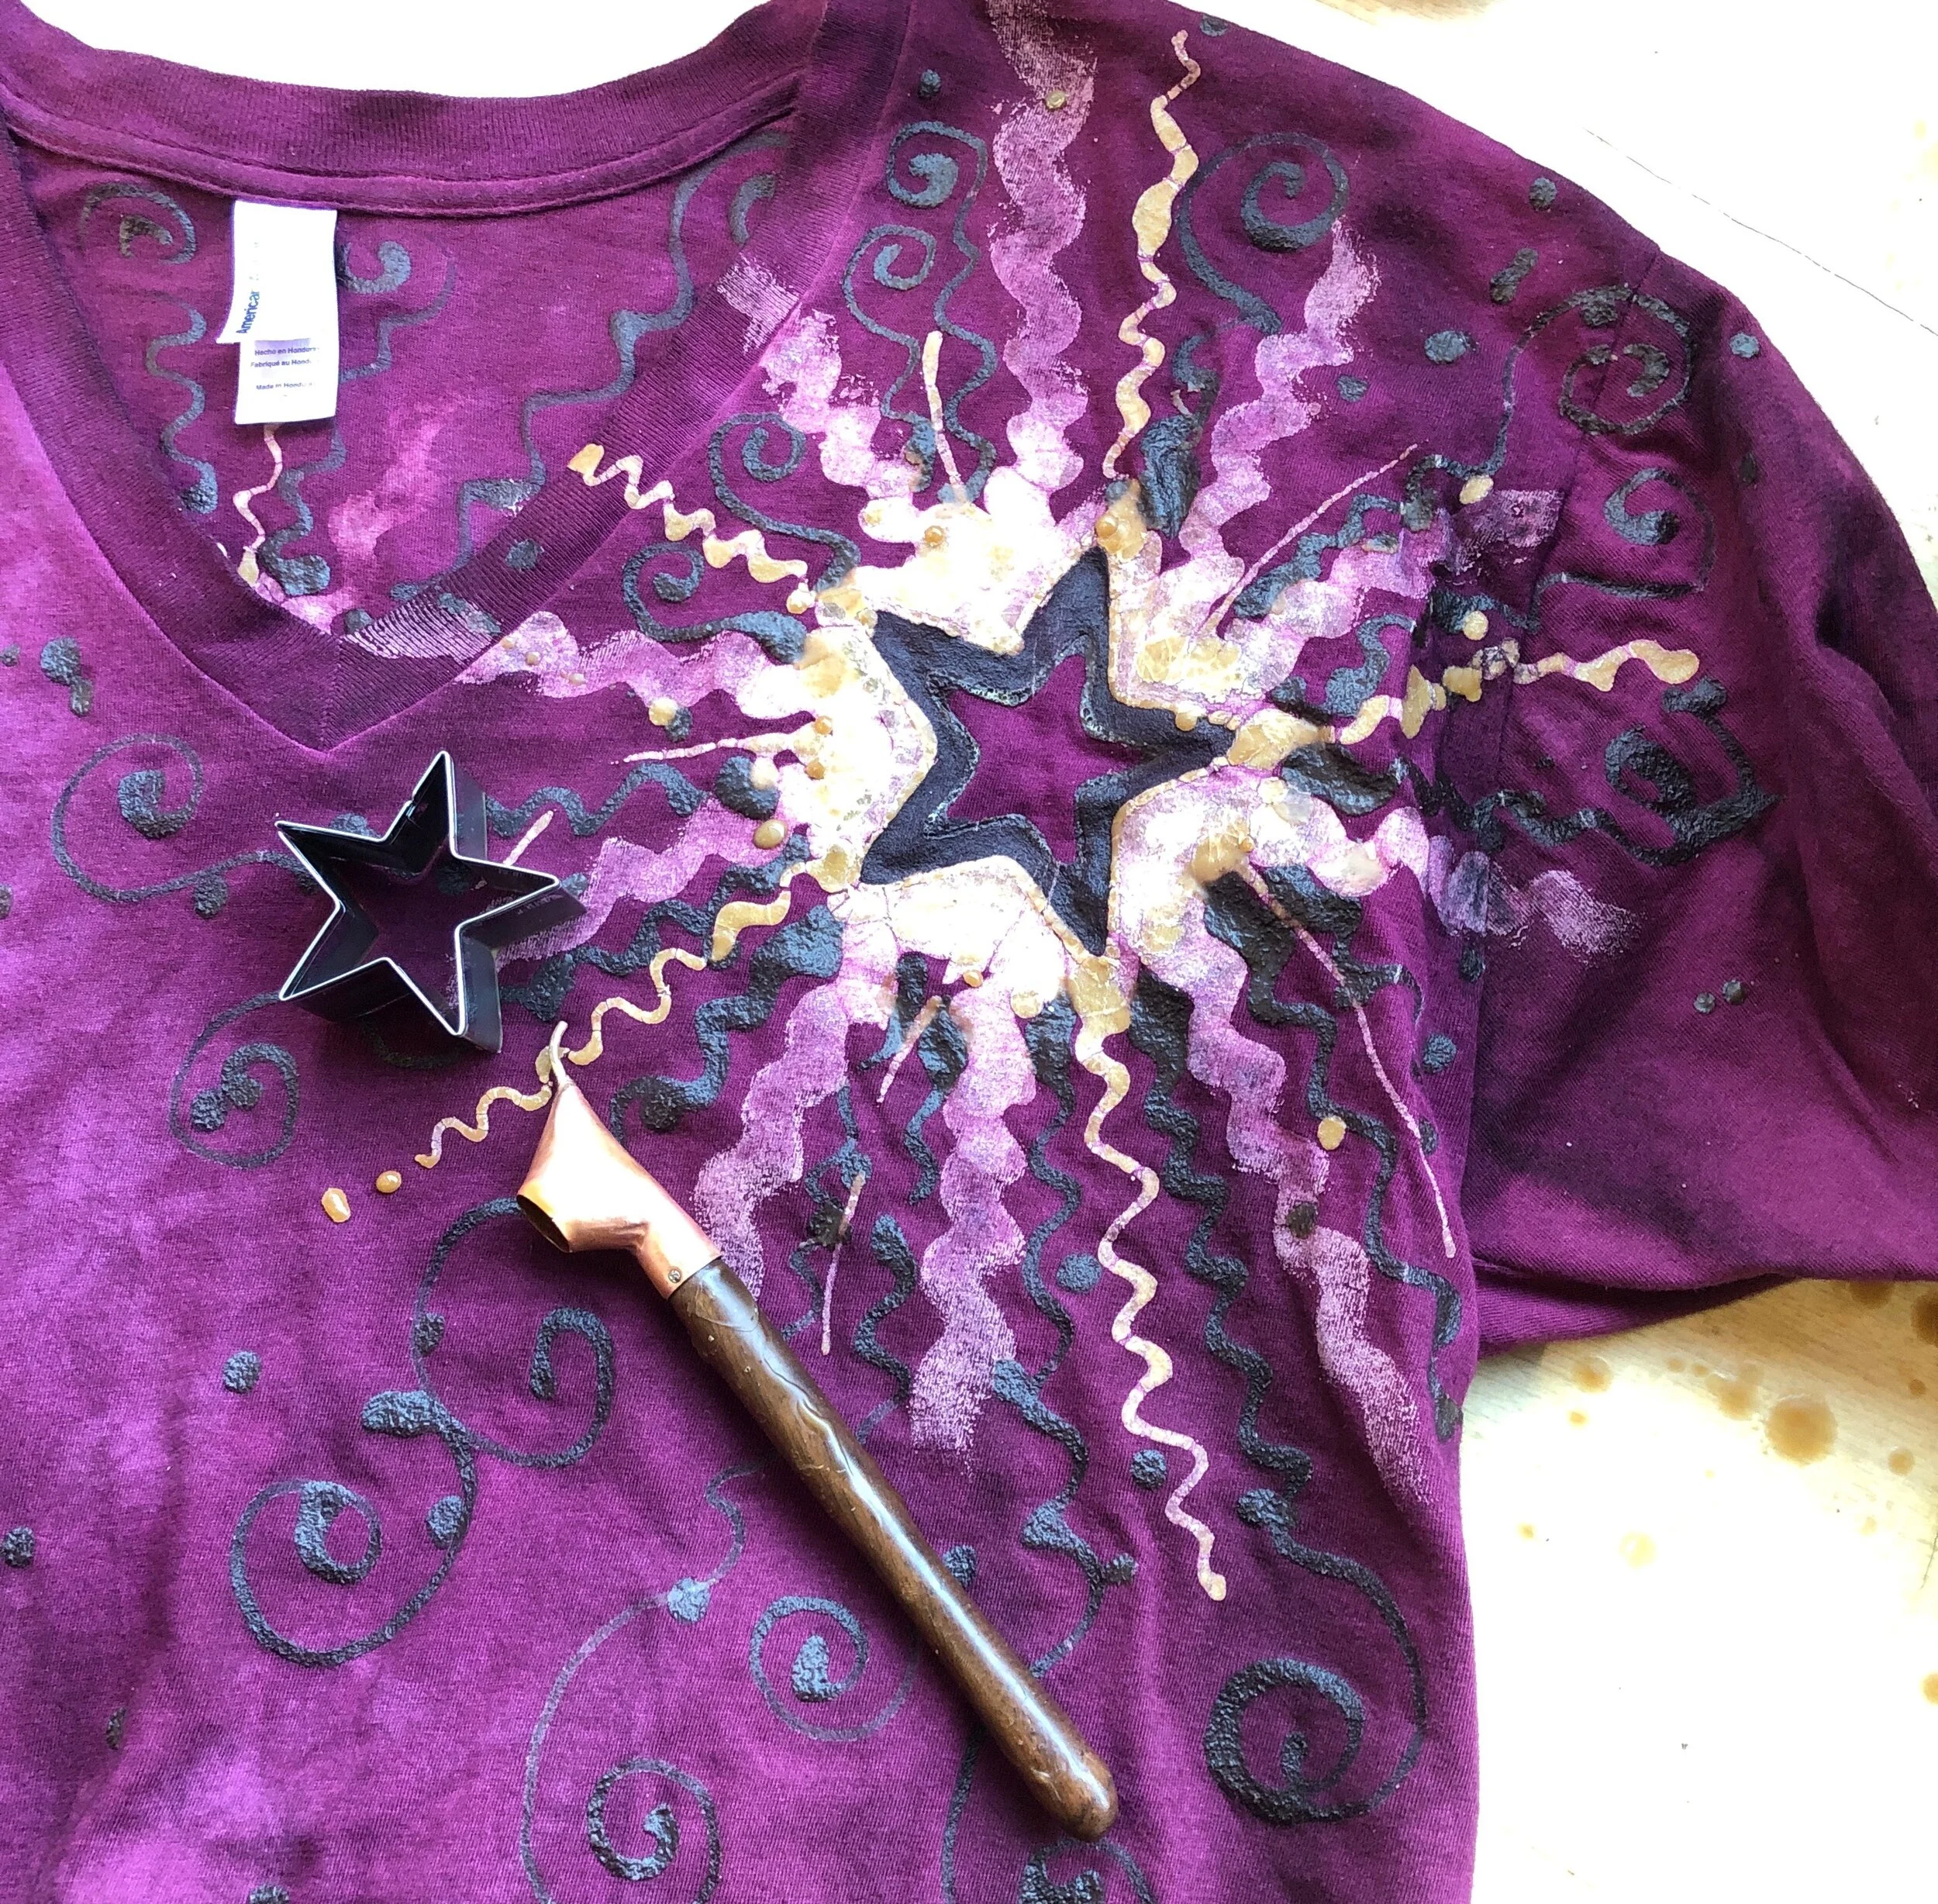
Here’s a toddler-sized batik shirt, photographed in between layers of wax and dye. The white lines are the wax I put down first, then I dyed the shirt amethyst, before waxing over the amethyst color. I used a cookie cutter and a traditional Indonesian tjanting tool, one of my favorites.
What Is Batik Wax?
Since we’re discussing all things batik wax removal: technically, batik wax is any wax that you use to block sections of fabric off from the dyes. In other words, you wax any area(s) that you don’t want to get dyed.
Some people use soy wax, some people use paraffin, some people use beeswax, and some people use a mix of those. And, before we move on I do want to make a point about soy wax.
Soy wax is prized in some batik artists’ processes because it doesn’t need to be removed — it just washes out. Soy wax batik is great for teaching kids, and I taught batik with soy wax at summer camp for years and years.
I don’t use it in my own work, or for WAXON’s products, however, because I don’t think it has the traditional crackle effect, and I don’t like its environmental impact, or its smell.
Some artists call their art batik and they’re actually using gutta, or Japanese rice paste, or some other non-wax based resist. That’s all fine!
But here we’re going to talk about beeswax & paraffin, because they’re the most traditionally and commonly used waxes for batik. Removing wax from fabric is important to matter what kind of batik wax you choose.
Note: There is an actual pre-mixed wax product called “Batik Wax.” It’s 50% paraffin, 50% microcrystalline (synethic beeswax). I prefer to mix my own or use straight up real beeswax, not synthetic.
How Wax Is Used During The Batik Process
Batik is such a magical art. All praise to the ancient Indonesian people for inventing it, and spreading it to Malaysia, then all over the world!
As batik traveled to other parts of the globe, artists from various cultural regions came up with their own diverse ways of creating designs with wax serving as the resist in their dyed fabric creations.
There are non-wax forms of resist dyeing that are equally as beautiful and steeped in the craft history of the areas from which they come, i.e., mud cloth, and rice-paste resists. For our purposes, we’re going to discuss the wax-on-fabric process of batiking.
And since I only use fiber reactive (procion) dyes, assume that’s what I’m taking into consideration, not acid dyes, RIT dyes, or botanical dyes.
When you start with a piece of cloth, the cloth is a blank slate for your designs. Most of us start making art as small children by drawing or painting the design we want to see: creating a positive design, aka the background is not drawn, but the design is.
Think of writing your name with a blue crayon on a piece of white paper. That’s a positive design.
On the other hand, if you were to color the whole paper blue except for the shapes of the letters in your name, that would be a negative design, since you’re drawing all the areas except for the design.
Does that make sense? I hope so… I’m a crafts instructor, not an art teacher.
Now, imagine a piece of white cloth that you’re going to batik. You have some hot wax and some blue dye.
In order to have your name show up on that cloth, you could paint your name with the hot wax and then dye the cloth blue, which would give you white letters and a blue background, because wherever the wax is, the dye can’t go.
Or, you could wax everywhere on the cloth except the spaces that the letters of your name take up, and then dye the cloth blue: this would give you blue letters and a white background, because again, wherever the wax is, the dye can’t go. Got it?
Batik requires you to be able to think of your design in both positive and negative. It can be challenging, but it’s wonderfully fun.
Once you get the hang of it, you can create more layers of wax and color in your design, letting the dye colors turn each other into new colors, and waxing over parts of your designs that you want to stay one particular color or another.
The important thing to know is that you don’t remove the wax until you’re completely finished with your design… never in between layers or parts of your design. Your cloth, whether it’s a wall hanging or a t-shirt, is going to have wax on it until you’re absolutely done with all parts of your design.
Sometimes you have a LOT of wax on your fabric… and eventually, it’s time to get all that wax off of there.
Want to get more into the color blocking, layering part of batik? Check out this video I made while on my India trip in 2018!
Reasons Batik Wax Removal From Fabric Is Needed
Why is batik wax removal such a frequent topic for newbies? Well, you don’t want to wear a batik shirt covered in layers of wax, do you? Or have a pretty wall hanging in your bedroom, flaking bits of wax all over the place?
Plus, with batiks, you can’t really see the beauty & details of the design until you remove the wax; it’s truly the big reveal of this craft. So for both your comfort and for the visual appeal, we do need to remove the wax.
There are a couple different ways this can be done, and of course, it varies in details & exact steps around the world, but not by much. When I went to Gujarat, India to do my informal study of traditional Kutchi woodblock batik, I was amazed to see them performing almost the exact same steps I’d been doing for twenty years here in Western North Carolina.
Do your wax removal correctly and you have a soft, vibrant fabric that you can’t even tell was ever covered in wax. Do it incorrectly and you’re fighting with a stiff, sticky, messy fabric for days, if not forever.
Batik Wax Removal Methods
I can think of three main methods of wax removal that are discussed in batik circles. The first two are ones I don’t use, so let’s start with what they are and why I don’t use them.
Are you a big fan of one of these methods? Holler at us in the comments below and let me know why you like it!
Method #1: The Hot Iron & Paper Technique (I don’t use this one)
Back in the 1970s, this was the preferred way to remove wax from your batiks, especially for wall hangings (or so I’ve been told). It can be a very handy trick to have up your sleeve, but I don’t use it as my main method of wax removal.
With the hot iron and paper technique you sandwich your finished batik project in between layers of brown paper (or packing paper, newsprint, etc.). Then you go over the paper with a very warm iron.
You can melt the wax off the fabric and embed it into the paper surrounding it. Notice I said off the fabric and not out of the fabric.
With the iron & paper method, you are definitely melting most of the wax off, but a lot of it is being baked into the fibers of your piece, and once they’re in there, you really can’t remove them.
So that’s downside #1, you end up baking a thin layer of wax into your entire project, leaving a dark oily stain that is very visible to the eye. Downside #2 is that when the fabric cools, it stiffens, due to the wax being ironed into the fabric.
So you have a stiffer, less draped fabric than you started with. Totally fine for tapestries and wall hangings! Not ideal for wearable items, though.
And downside #3 is you use a LOT of paper because you have to keep changing out the paper top and bottom every time it gets full of wax. Sure, you can use it for fire starter if you have a wood burning stove or a fire pit at home.
But if this is your main batik plan, think otherwise before committing to taking all that paper out of the recyclable category.
There is an upside to this method. You can use it to carefully spot-treat stubborn hems & seams that the wax won’t release from when using the boil method. Put a pin in that, we’ll refer to it below.
Method #2: Taking it to the Dry Cleaners (I don’t use this one)
Not to offend anyone if you do this, but I find this method lazy, and environmentally irresponsible. Some dry cleaners will still take your wax-covered things and use powerful chemicals like paint thinner to remove them from the fibers.
I am not down with those chemicals, and not every dry cleaning business will still take your batiks. Apparently this is something lots of people used to do?
Poor dry cleaners. Poor fabrics. Skip this method and just move on to the next — it’s a lot safer for all of us.
Downsides to this method include yucky chemicals, it costs $$$, it’s bad for the people who have to do it for you, and it can be stinky.
Method #3: The Boil Pot (I will use this forever & ever)
Yay, we finally get to the labor of love - the boiling method! This method has many upsides:
It completely removes the wax out of your fabric (as long as the fabric is not synthetic), so you get a very soft, wax-free finished project.
It allows you to re-use your wax, which is great for your wallet and great for the planet, especially if you’re using pure beeswax.
You can use the same water again and again until it’s too dark to see through anymore, thereby saving water.
You can boil & boil again if you don’t get a complete boil-out the first time.
Depending on the size of your projects (and your pot), you can remove the wax from several things in one go, saving you lots of time.
It is really fun and satisfying to break, peel, or lift the cooled wax off the surface of the water.
There are a few downsides too. You can’t really tell if the wax has completely boiled off until the water has cooled (if you use my method).
You can’t overstuff the pots full of fabric, or they won’t have enough room to release the wax up to the surface. You do need to stay with it at first, poking the fabric back down under water, until you get the sense of how long it takes to reach the ideal temperature.
And… that’s really it! The upsides definitely outweigh the down.

Isn’t she lovely? Warm wax at the surface of the boil pot, after batik wax removal, waiting to cool. It’s all reusable!

Freshly boiled, perfectly clean fabric waiting below the cooled wax layer.
How to Remove Batik Wax Using the Boil Pot Method
At WAXON, I use induction burners, the cheapest I can get, and pots that have the right kind of bottoms for induction burners to work with — the biggest ones I can find.
You want lots of room for your little batiks to swim around in, releasing their wax! The induction burners are great because they reduce the risk of fire (no red hot element to worry about), and you can set the temperature and walk away, or even set the timer, if you need to leave your studio.
I set mine for 210 degrees F, which is just about water’s boiling point.
Step 1 - Rinsing
Once your batik is finished, and the dyes have set, give them a thorough rinse in cool water — rinse until the water runs clear. You’re ready to turn on your pots.
You can either put the batik in once the water has come up to temperature, or you can put them in cold and let them heat up with the water. I have noticed no difference in terms of back staining.
Step 2 - Poking
You’ll need a poking implement, like a long stick or spoon. I have been using the same few wooden & plastic spoons for years!
No need to clean the wax off each time, just let them be used solely for the purpose of poking your underwater fabrics.
Step 3 - Melting
When the water is gently simmering, let the fabric naturally loosen itself from the wax. The wax will start melting off and up — floating up to the surface of the water.
You want to keep the fabric under that wax! If you allow your fabric to just boil away at the top of the water, you could get wax stuck in seams and small tubular channels like folded over hems of sleeves and the bottoms of shirts.
That’s because the wax can enter those places while melted and liquid, but then it cools in those very hard to remove places, and you might have to boil it all again.
Keep it down, now— literally down under the surface. And keep an eye on it. Poke, prod, swish it all around under the surface and watch the wax globs come up and melt.
Step 4 - Cooling
When you suspect all the wax has come up to the surface, it’s time to turn off the heat and let the whole thing cool down. You have choices here.
You can either let the wax at the top cool completely, so you can peel it off like a big wax cookie (or break it and remove it in pieces, if it’s too stiff or cold), or you can start scooping the wax off the surface and pouring it into another container, so that you can take the pieces out sooner.
Watch me gently poke & stir the batik to help release its wax up to the surface.
The benefit to scooping wax off the surface is that you don’t have to wait as long, so it can be good for impatient people or those on a deadline. But there are downsides to scooping.
If you don’t get all the melted wax off the surface of the water, and then lift your nice clean piece up and through that surface, you’re just putting hot wax back onto your piece. Bummer.
Also, it’s not quite as easy to reuse, I think, if it’s scooped into another container along with the water you inevitably scoop up.
I think it’s better to just wait for the pot to cool, then take the wax off in one fail swoop, knowing you have totally wax-free pieces inside the pot. Then, you can let your wax cookie dry, and it’s ready to re-melt.
Don’t put wet wax into your wax melting device. It can pop and really hurt you — remember, oil and water don’t mix, and wax is oil. Let wax dry completely before reusing.
The most satisfying part! Removing the cold wax from the surface. Usually I just let it all cool down overnight and remove wax the next day.

Sometimes there’s enough wax on the surface to make a nice, whole cookie shape…

…and sometimes, there’s just not enough! This wax is still cool and easy to remove, though.
Step 5 - Remove Clingers
The final step in the boil-out process is to get off all the cold little wax “dingleberries” (as I call them) that might be clinging to the fabric. Note that the wax at this stage should only be beaded up on the surface of the fabric, not still embedded in the fabric!
If any part of your design still has wax in it, not on it, you either didn’t boil long enough, the fabric was too crowded in the pot, or your fabric is part polyester. Sadly, synthetic fabrics bond permanently to the wax, and boiling doesn’t help.
In this case, use the paper & iron method — hopefully you’re making a tapestry and not a soft t-shirt.
I like to take my freshly boiled fabric outdoors and give it a good shake. The dingleberries should flick right off the fabric.
Any big pieces that fall off indicate that they cooled in between folds of fabric, instead of up at the surface. That just means you needed to poke it more vigorously to help the wax come to the surface while it was simmering.
Thinner fabrics boil out faster than thick, and woven fabrics boil out faster than knits. So a lightweight woven cotton is your best choice for this method. That’s why our beginner batik lesson is on a nice light cotton wall hanging.
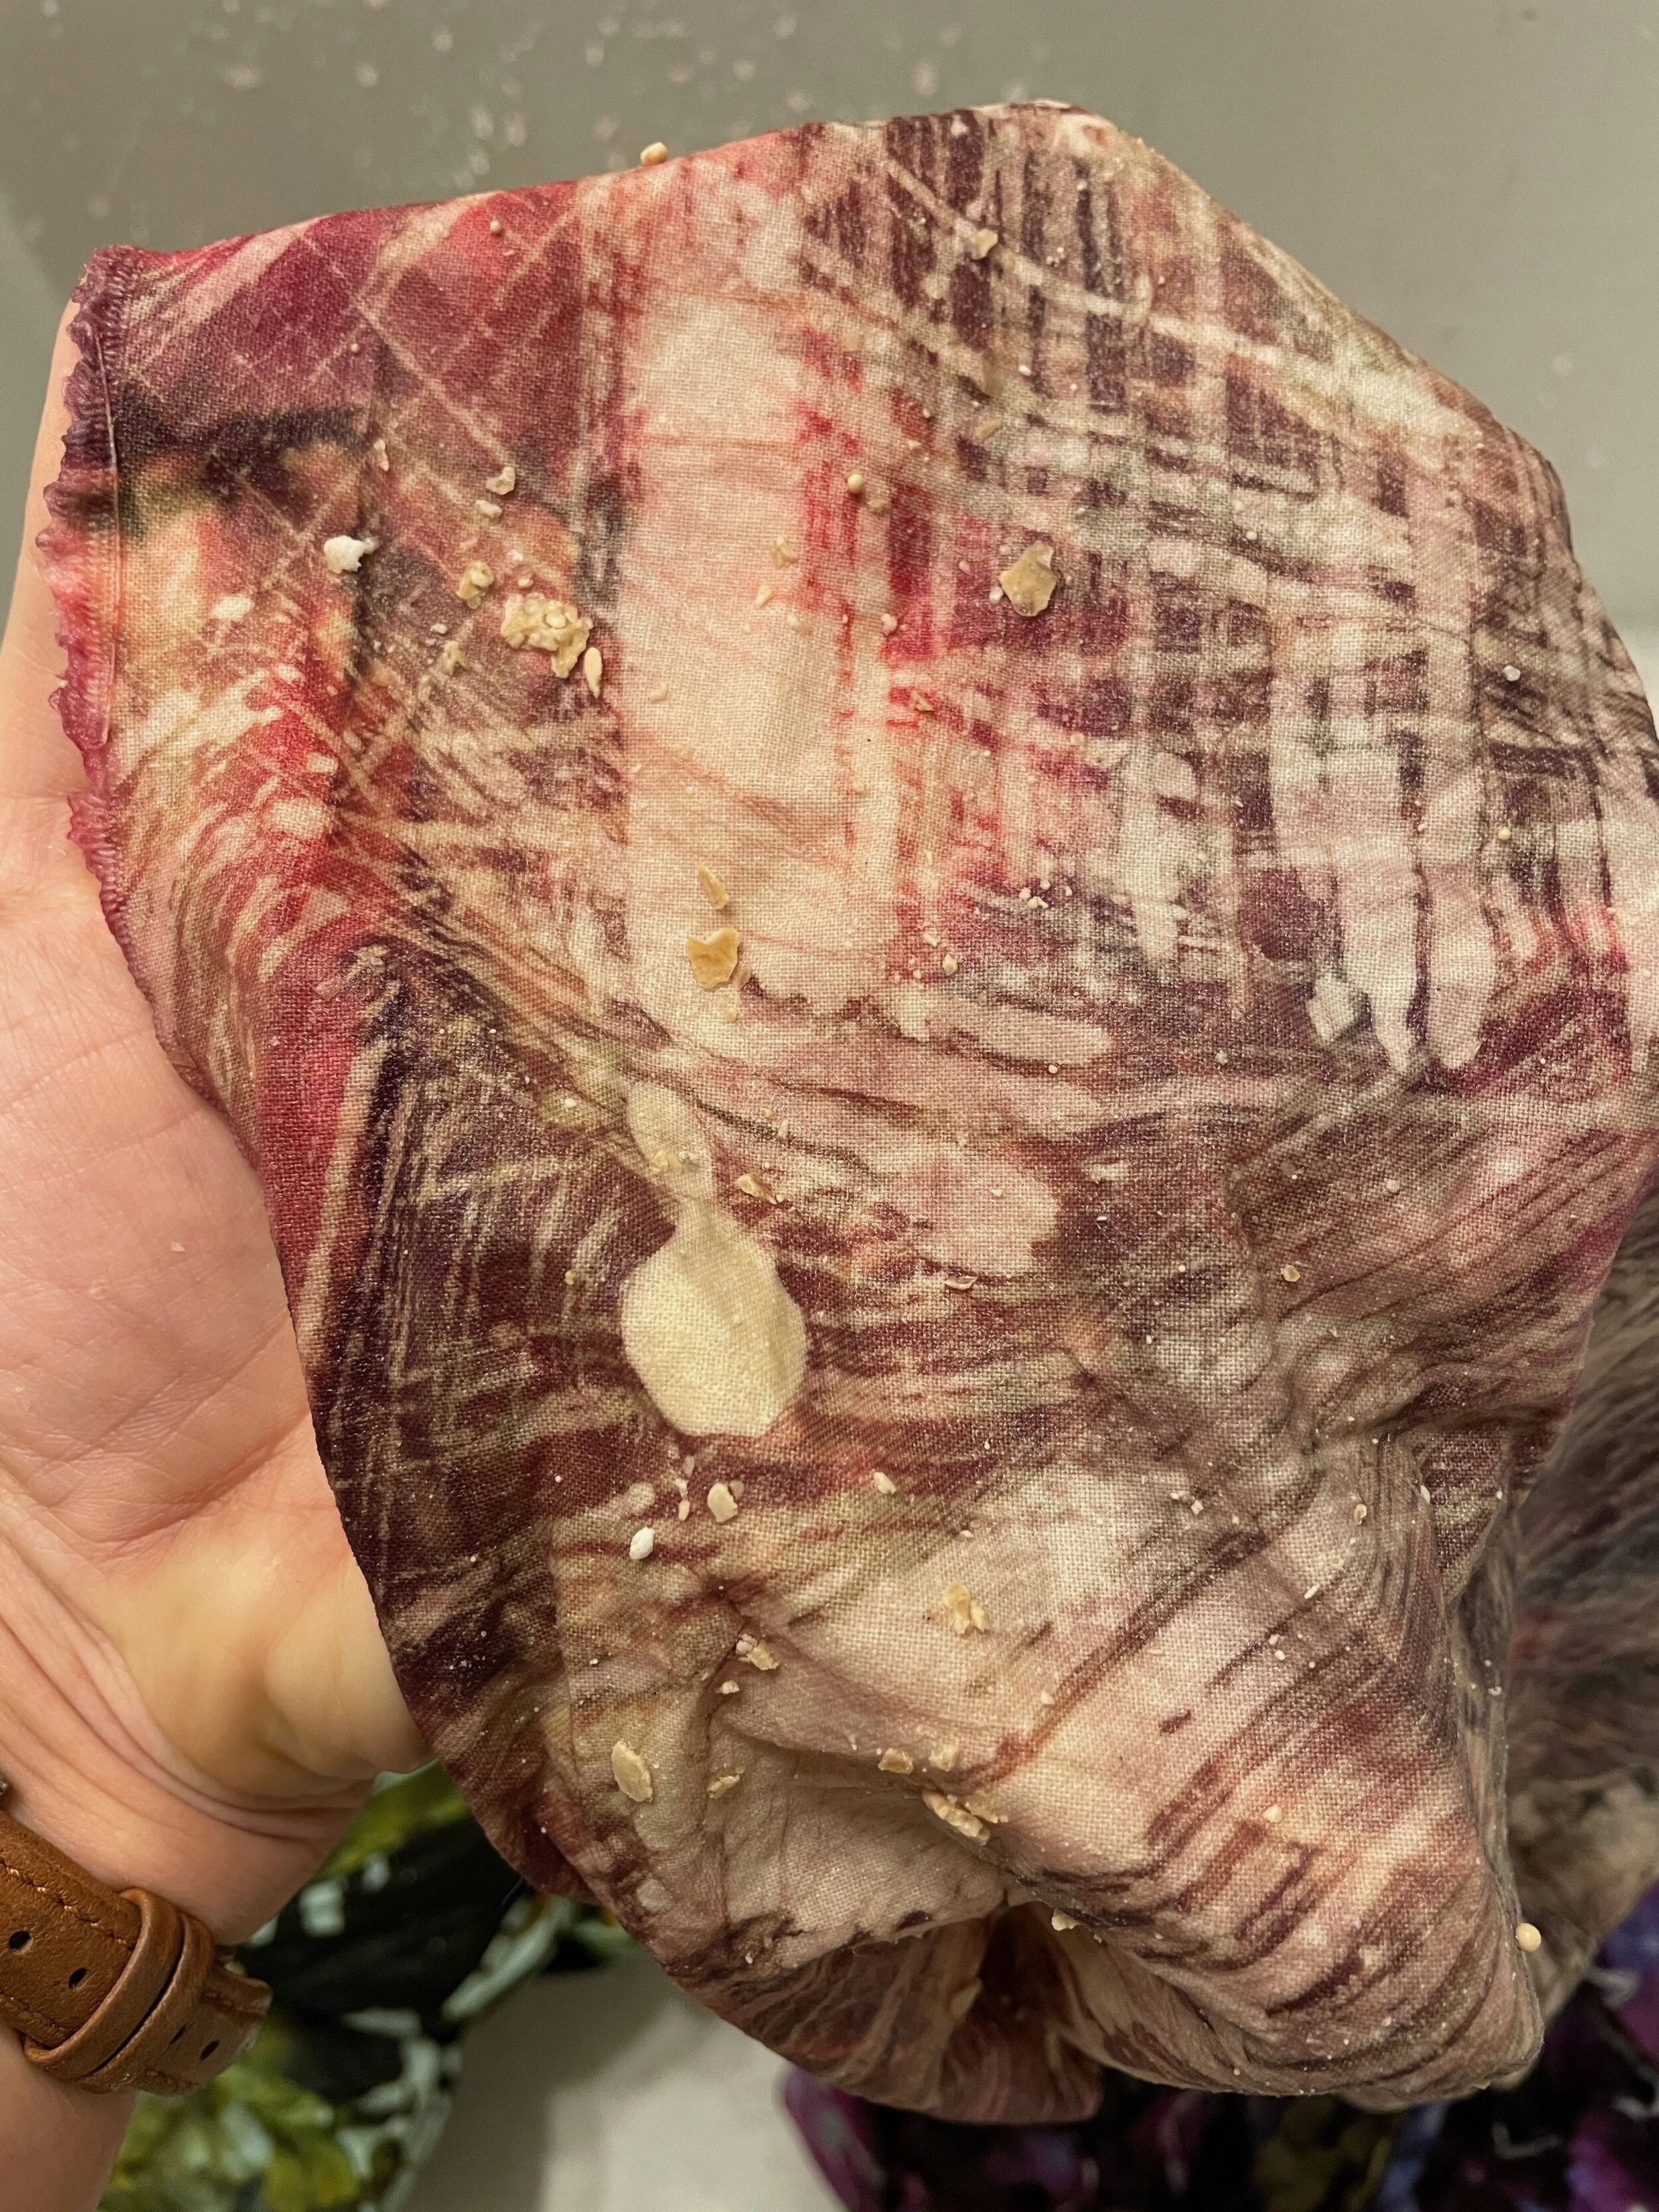
An extreme closeup of the wax bits clinging to the surface of a cooled, boiled batik fabric. Note that the design shows that the wax has been removed from the fabric itself; all we have to do is shake these clinging bits off.
Batik Wax Removal Important Notes
There are a few more items that are important to note on batik wax removal before I sign off.
Polyester Thread
Garments sewn with polyester thread present a special problem. In my long history with batiking on commercially sewn garments, I repeatedly see the issue of wax bonding to the synthetic threads.
I’m talking about the threads used to sew the actual garments together, even on 100% cotton clothing. For example, you buy a 100% natural fibers shirt, but it’s still sewn with nylon thread.
Not only do those synthetic threads not take the dye, but they also get all gunked up with wax in every seam. You can try adding a little Blue Dawn dish soap to the boil pot to help encourage more wax to leave the seams, but that doesn’t work every time.
If nothing works, wait until the piece is boiled, shaken out, and hung dry, then use the paper & iron trick for the seams.
Boiling Out More Than One Piece at a Time
You can absolutely boil out several pieces at once, even if they were dyed totally different colors.
Just be sure you’ve given them all a very thorough initial rinse, and there’s enough room in your boil pot for all the fabric to move easily and for the wax to travel up to the surface.
When in doubt, put less fabric in than you think you could fit. There’s nothing more annoying than waiting a whole day for the pot(s) to cool, then looking at your fabric to see that it still has a bunch of wax in it.
Now that you know how to remove wax from batik, learn more about how to do batik today!
I have a great $5 mini course on creating multi-layer batiks available, and over 100 people have enrolled so far. Click on over and watch the tutorials! A larger, more complete online course will be launched at some point in 2021.
Besides that, there’s always my YouTube videos. If you haven’t already joined The Dyenasty, my mailing list, jump on that, too. I send out exclusive tutorials once a month, but you need to be on my mailing list to get them.
Here’s the first-ever batik video made at WAXON’s first little studio space— circa 2016!